The floor of any playroom can look like a mess after a storm. You might see a firefighter’s boot, a tulle tutu, and a superhero cape mixed with a pirate’s eye patch. It’s a mess. But what if this chaos could lead to something better than a cheap, one-time costume?
A starter capsule is like a minimalist wardrobe for make-believe. Instead of buying a single costume, you create a small collection of easy kids patterns. These patterns can be mixed and matched to create many different outfits. A simple tunic can become a knight’s tunic, a wizard’s robe, or a space explorer’s suit. A cape can be a royal mantle or a superhero’s emblem.
This isn’t just about saving money or being crafty. It’s a smarter, more sustainable way to play. You’re not just sewing clothes; you’re creating a world of endless possibilities. You’re giving your child a creative toolkit that grows with their imagination.
Forget about buying a costume that you’ll only use once. This is about building a wardrobe for your child’s imagination. It’s a sustainable, creative, and more intellectually rewarding way to play. So, let’s choose the imaginative and limitless over the flimsy and forgettable. Let’s start building a capsule.
Why Simple Patterns Build Confidence
We often make things too hard when we should just make a cape that makes a five-year-old feel like a superhero. It’s not about making fancy clothes; it’s about magic. You start with a simple pattern, like straight lines and elastic, and end up with something that boosts confidence.
For a child, wearing a homemade cloak is their first taste of making something. For you, it’s the joy of making something that actually fits. These simple patterns are the first step to becoming a maker, showing that success is more important than perfection.
For kids, the magic isn’t in the details but in the story. A cape made from fleece lets them fly in the backyard. A wizard’s tabard turns a Tuesday afternoon into an adventure. These clothes are more than just clothes; they give kids real confidence.
For adults, making something simple is just as empowering. A simple pattern is like solving a puzzle, and you feel a real sense of achievement. You learn new sewing skills and enjoy the process, making every step a victory.
These easy kids patterns teach important skills like geometry and patience. They’re the first step to a lifetime of making things. You’re not just sewing; you’re solving problems and learning new things.
It’s not just about making clothes; it’s about creating a world. With one easy kids pattern for pants and another for a cape, you can make a whole universe of possibilities. The child isn’t just wearing a costume; they’re living in a world they helped create. The confidence comes from both the play and the making.
| Aspect | Complex Pattern (Confidence Killer) | Simple, Confidence-Building Pattern |
|---|---|---|
| First Impression | Intimidating multi-page guide, a toil of frustration. | Single sheet, clear diagrams, instant “I can do this.” |
| Skill Required | Advanced techniques (set-in sleeves, tailored collars). | Mastery of 2-3 basic skills (straight stitch, elastic casing). |
| Confidence Impact | High risk of failure, leading to discouragement. | High probability of success, leading to the “I made that!” moment. |
| End Result | Often unfinished, a reminder of a project too far. | A finished, wearable, beloved garment. Pure, unadulterated win. |
The real magic happens when a child proudly says, “My mom/dad/grown-up made this for me.” The pride is in the story, not the details. These easy kids patterns are smart choices. They build skills and confidence, one stitch at a time.
Safety-First Fabric & Notions (Hypoallergenic, Breakaway)
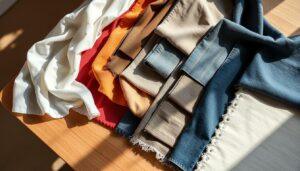
Let’s talk about the foundation of any great costume: the fabric. It’s not just about looks; it’s about making a safe, comfy, and strong costume. The wrong fabric can make a royal robe itchy and uncomfortable.
Hypoallergenic, Non-Toxic, and Durable
Think of your child’s skin as the world’s most sensitive critic. Cheap, synthetic costume fabrics can cause skin reactions. We’re not just sewing a costume; we’re making a second skin for a superhero.
Durability is key to safety. A fabric that pills, fades, or shreds is a safety hazard. It must pass the “cheek test” and the “Twirl Test” without problems.
Fabric Choices for Sensitive Skin & Play
Choosing the right fabric is less about looks and more about science. Here’s the breakdown of your textile toolkit:
- Breathable Cottons & Cotton Blends: The undisputed champions. 100% cotton, cotton-polyester blends, and cotton flannel are breathable, soft, and generally hypoallergenic. They’re the reliable workhorses of the fabric world.
- Low-Pill Fleece & Minky Fabrics: Perfect for cozy capes and warm tunics. They’re soft, durable, and the good ones are often made from recycled materials. Always check the label for Oeko-Tex or GOTS (Global Organic Textile Standard) certification to ensure low chemical impact.
- Broadcloth & Poplin: These are your go-to for crisp tunics, tabards, and structured pieces. They hold their shape well and are a dream to sew with.
- Fabrics to Approach with Caution: Stiff brocades, cheap polyester satins (which can be itchy and non-breathable), and glitter-encrusted fabrics (which shed microplastics and can be a choking hazard).
The pre-wash is non-negotiable. Washing and drying your fabric on high heat before you cut a single pattern piece is your first line of defense. It tests for colorfastness, pre-shrinks the material, and helps remove any chemical finishes or irritants. Think of it as a trial by fire—or a trial by spin cycle.
For closures, think safety and independence. The humble elastic waist is a marvel of child-friendly design, giving comfort and ease of wear. For the necklines of capes or tabards, consider hook-and-loop tape (Velcro) or large, flat, magnetic snaps instead of traditional buttons, which can be a choking hazard and a frustration for little fingers.
Your Fabric Selection & Care Quick Guide
| Fabric Type | Best For | Care & Safety Notes |
|---|---|---|
| 100% Cotton, Cotton Blends | Base layers, tunics, soft pants | Pre-wash in hot water to shrink and soften. Natural, breathable, and low-irritant. |
| Cotton Flannel | Warm cloaks, cozy vests | Incredibly soft, gets softer with washing. Check for pilling. |
| Low-Pill Fleece | Capes, warm linings, hoods | Warm, durable, and quick-drying. Opt for recycled or Oeko-Tex certified. |
| Broadcloth/Poplin | Tabards, tunics, dress bodices | Holds structure well, crisp finish, excellent for appliqué. |
In the end, the fabric you choose is the co-star in your child’s adventure. It should be a silent partner in play, not the itchy, scratchy villain of the story. Choose wisely, wash thoroughly, and build a costume that’s ready for a hundred dragon battles and a thousand spins.
Pattern 1: Elastic-Waist Adventure Pants (Step-by-Step)
Forget the straight and narrow. We start with a new idea: the elastic waist. This isn’t your grandma’s elastic. It’s for freedom of movement. We’re making pants for adventure, forgiving for mistakes and growth.
The “No-Fail” Fit for Wizards and Explorers
Every wizard needs a reliable robe. Every explorer needs pants for sudden moves. The elastic waist is the great equalizer. It fits all, expanding for meals and shrinking for adventures.

The genius is in the casing—a fabric tunnel for the elastic. It’s like a drawbridge for your waist. The elastic is the hero, flexible and strong, for all your moves.
| Step | Action | Why It Matters |
|---|---|---|
| 1. Measure & Cut | Cut two identical pant legs from your durable, kid-friendly fabric. | Accuracy here prevents wonky legs. Use a simple pajama pant pattern or a trusted basic block. |
| 2. Sew the Inseam | With right sides together, sew the inner leg seams. | Creates the foundational “pant” shape. Reinforce the crotch seam for durability. |
| 3. Create the Casing | Fold and stitch the top edge to form a channel, leaving a 1.5″ opening to thread elastic. | This tunnel is the heart of the elastic waist system. Precision here prevents twisted elastic. |
| 4. Insert Elastic | Thread elastic through the casing, secure ends, and stitch the gap closed. | Use a safety pin to guide the elastic. The elastic should be 2-3 inches shorter than the child’s waist for a snug, comfortable fit. |
| 5. Hem & Finish | Hem the legs to the perfect “no-puddle” length for your little explorer. | Use a zigzag or stretch stitch for a hem that moves with the fabric and active play. |
This isn’t just sewing; it’s applied physics. The elastic waistband acts as a suspension system, distributing pressure evenly. It’s the difference between a garment that fits and one that fits right now. The beauty is in its adaptability. The same pair of adventure pants can fit through a minor growth spurt or a major holiday feast, making it the most democratic piece in a child’s wardrobe.
The final test? The spin test. A well-constructed elastic waist allows for a full 360-degree twirl without hiking or pinching. If your young wizard can spin like a top without the pants heading south, you’ve achieved elastic waist nirvana. It’s a small victory in the sewing room, but a giant leap for playtime-kind.
Pattern 2: Reversible Cape with Velcro Neck
If a child’s first act of heroism is choosing their own adventure, then the second is choosing their own costume. Our second pattern, the Reversible Cape, is a masterclass in simple, transformative design. It’s a study in dual identity: one side for the hero, the other for the villain, the monarch, or the mystical sorcerer. It’s two costumes in one, a 100% increase in imaginative play per square yard of fabric, and a masterclass in practical design for fidgety, impatient heroes-in-training.
At the heart of this design is a beautiful, almost subversive, piece of engineering: the Velcro neck closure. We’ve all been there—watching a small child struggle with a finicky toggle or a complicated tie. The Velcro closure is the great liberator. It’s a study in accessibility. With a satisfying rrrriiiip, the cape is on. With another, it’s off. It empowers the child to suit up or change characters in seconds, and it’s a critical safety feature. Unlike a tied cord, it’s a quick-release system for the inevitable moment a cape gets caught on a doorknob or a playground slide.
The Velcro Closure: A Study in Superhero Physics
Let’s not call it just a fastener. For a child, that strip of hook-and-loop tape is a piece of magic. It represents independence. They can do it themselves. This is the superhero’s first act of agency: the fastening of the cape. It’s a tactile, satisfying, and empowering sound and sensation that a button or a tie simply can’t match for a small child. It’s not just a closure; it’s the activation switch for their alter ego.
The “reversible” concept is where the genius of play value is fully realized. One side, perhaps a regal royal blue for a noble knight. A quick flip, and the other side—a villainous crimson or a deep space black—is revealed. This isn’t just a costume change; it’s a narrative device. It allows a child to switch allegiances, motivations, and storylines in the span of a twirl. It’s a study in dual identity, powered by a simple, brilliant design.
To illustrate the dual-nature of this project, here’s how the two sides can play out:
| Side A (Outer) | Side B (Reversible Side) | Character Archetype |
|---|---|---|
| Royal Blue Satin | Crimson Felt | Noble Knight / Dark Sorcerer |
| Galaxy Print | Shimmering Silver | Space Explorer / Futuristic Hero |
| Forest Green Felt | Faux Fur Trim | Woodland Ranger / Fearsome Beast |
When choosing fabrics for your reversible cape, consider the dual nature of the project:
- Durability: Can both fabric choices withstand the “twirl test” and the occasional “superhero landing” on the living room rug?
- Contrast: For maximum dramatic effect, choose two fabrics that are distinctly different in color and texture.
- Safety First: The Velcro closure is a safety feature. It provides a quick, safe breakaway if the cape gets caught, a non-negotiable for any active play.
Constructing this cape is a fantastic beginner project. It involves simple rectangular cuts and straight seams. The magic is in the finishing: you’ll sew the two fabric layers together, right sides facing, leaving a small gap. Then, you’ll turn the whole piece right-side out through that gap, press it flat, and topstitch around the edge for a clean, professional look that encases all the raw edges. The final, critical step is attaching the Velcro to the neck strap. This simple Velcro closure is the linchpin of the entire design, turning two pieces of fabric into a portal to another world.
This reversible cape is more than an accessory; it’s a tool for storytelling. It teaches a subtle lesson in physics (the satisfying rip of Velcro), provides a lesson in practical design (the reversible nature doubles its utility), and most importantly, hands the power of transformation, quite literally, to the child. They are in control of their costume, their character, and their adventure. The only thing it can’t do is choose which side they’ll play on today.
Pattern 3: Knight/Explorer Tabard with Side Ties
The tabard is like a Swiss Army knife for costumes. It’s simple, adaptable, and has a rich history. With just a piece of fabric, some cuts, and ties, kids can become knights, heralds, or healers. It’s like the costume world’s little black dress, but with more flair.
This pattern is easy to sew and looks more complex than it is. It’s a great way for kids to start sewing. It’s a simple yet versatile design that’s perfect for beginners.
No-Sewing Gauntlets: The Genius of the Side Tie
The side tie is the real star of this pattern. It makes getting in and out of the costume easy. No need for complicated closures here. The side ties turn a flat piece of fabric into a wearable garment that can be adjusted.
This design is like a modular system. A tabard can change from a knight’s surcoat to an explorer’s tunic to a wizard’s robe. The side tie makes it easy to adjust, perfect for growing kids.
The engineering behind it is brilliant. Unlike sewn seams, ties can be adjusted infinitely. It’s a concept as old as the toga, but new for kids’ costumes. It allows for layering and fits snugly over various clothing.
Looking for easy kids patterns? The tabard is your go-to. It’s simple, with no need for darts, zippers, or buttonholes. It’s a lesson in functional design and a piece of wearable history.
Pattern 4: Skater Skirt with Encased Elastic Waist
The skater skirt is a spin champion in kids’ dress-up. It combines function and physics for the perfect twirl. This pattern is easy for beginners and looks professional, thanks to the encased elastic waistband.
This waistband is more than just a simple fold. It’s a channel of comfort and adjustability. It forgives small measurement mistakes, ensuring a comfortable fit for any child.

The Twirl Test: Engineering for Spin
The real test of a twirling skirt is on the living room floor. The “twirl test” checks if the skirt spins well. Skater skirts, with their A-line or flared shape, are a physics marvel in disguise.
The secret to their spin is the cut of the fabric and the encased elastic waist. This waistband is better than a basic one. It’s folded and stitched to hide the elastic, making it smooth and comfortable.
The skirt’s ability to twirl well depends on its fabric and shape. Lighter fabrics make it floaty, while stiffer ones make it bouncy. The right mix of flare and fabric is key for a great twirl.
Fabric choice is critical for a perfect spin. Not all fabrics are good for twirling.
| Fabric Type | Drape & Flow | Twirl Factor (1-5) | Best For |
|---|---|---|---|
| Lightweight Cotton Voile | Airy, soft, and floaty. | 5 | Classic, ethereal twirl. Perfect for fairies and sprites. |
| Cotton Sateen | Crisp with a subtle sheen; holds shape. | 4 | A structured, bouncy spin with a satisfying swish. |
| Polyester Chiffon | Ultra-light and flowing, almost liquid. | 5+ | Maximum, dramatic flare. The twirl champion. |
| Cotton Jersey | Soft, stretchy, and forgiving. | 3 | Comfort and ease for all-day superheroics. |
| Stiff Tulle Overlay | Architectural and voluminous. | 4 | Creates a dramatic, structured, “cupcake” silhouette. |
Building the encased waist is the engineering highlight. It’s more precise than a simple fold but looks professional. This method ensures a smooth, comfortable waistband that lasts through playtime.
When your little dancer wants to twirl, you’ll see more than a skirt. You’ll see a lesson in physics, fabric science, and the engineering of a elastic waist. It’s a beginner-friendly project that looks professional, showing that the best costumes are well-engineered.
Cutting Layouts & Pin Safety for the Family Workshop
You have your fabric, patterns, and a vision of a tiny knight or superhero. Before sewing, the layout and cut are key. It’s like the first move in chess, where the cutting table is your board.
A smart layout saves fabric, money, and makes sewing safer and more efficient. Let’s make your cutting table efficient and safe.
Fabric Efficiency for the Win
Think of fabric as a game board and pattern pieces as game pieces. The goal is to fit them with little waste. This is a spatial puzzle that saves money and fabric.
Before cutting, play “fabric Tetris.” Lay out pattern pieces on the fabric, respecting grainlines. Try to fit pieces together like a puzzle. This is not just craft; it’s about managing resources.
The payoff is a deep sense of satisfaction and a manageable scrap bin. It’s perfect for future easy kids patterns like appliqués or doll clothes.
Scissor Safety & Pincushion Protocol
Now, let’s talk about scissor safety. Scissors are not toys; they are precision tools. Always cut away from your body. This is a physics rule to avoid accidents.
Pins are also important. They must have a home. A magnetic pincushion or wrist-mounted one is a safety device. A stray pin is dangerous for bare feet.
The rule is: a pin is either in the fabric, in the pincushion, or being moved. There’s no in-between.
| Tool | Correct Use | Safety Protocol | Why It Matters |
|---|---|---|---|
| Fabric Shears | Long, smooth cuts along fabric grain. | Close blades when not in use; never use on paper. | Prevents fabric from fraying and keeps blades sharp. |
| Pins & Pincushion | Securing pattern to fabric before sewing. | Always return to pincushion; never leave on floor or chair. | Prevents painful accidents and lost pins. |
| Seam Ripper | Carefully removing stitches. | Point away from body, use with control. | Prevents accidental cuts and fabric damage. |
The family workshop is a place of creation, not a triage unit. By treating the layout and tools with respect, you make a chaotic moment into a masterclass. This disciplined approach is essential for all easy kids patterns you’ll create. It’s not just about making a costume; it’s about creating a safe and smart experience.
Seam Finishes That Survive Play (Zigzag, French, Serger)
If a child’s dress-up garment were a political system, its seams would be the constitutional framework. They are invisible but key to the garment’s strength. Choosing fabrics and patterns is important, but the real test is in the seams.
Seams face a lot of stress. A cape gets tugged, pants are climbed, and skirts are twirled. A weak seam can lead to fraying and failure. But the right finish can make all the difference.
The Anatomy of a Durable Seam
Let’s look at three finishes that focus on strength. Your choice shows how you see the garment’s life.
The Zigzag Stitch: The Accessible Democrat. It’s easy to find on basic sewing machines. The zigzag wraps the edge tightly but flexibly. It’s good for everyday wear but not the strongest.
The French Seam: The Couture Spy. This method hides the seam inside another seam. It’s perfect for reversible items. It’s strong because it’s hidden.
The Serger (Overlock) Finish: The Industrial Marvel. The serger sews, trims, and wraps the edge in thread. It’s great for high-wear areas. It’s the strongest of the three.
Choosing the right finish depends on the garment’s needs. For climbing pants, use a serger. For reversible capes, go with a French seam. For a beginner’s guide to finishing seams, check out this resource.
Finishing seams is about matching the finish to the garment’s use. A knight’s tabard needs strong seams for battles. An explorer’s gear needs edges that won’t fray. By focusing on these details, you ensure the garment’s durability for many adventures.
Fitting Hacks for the Growth Spurt (Growth Tucks, Adjustable Waist)
Children grow fast, like weeds in your garden. They outgrow clothes quickly. But what if clothes could grow with them? This isn’t about buying bigger clothes every season. It’s about making clothes that grow with them.
This approach makes clothing a process, not a product. It’s a dynamic solution to the growth spurt. It’s about building growth into the design from the start.
The “Growth Tuck” and Other Time-Traveling Tailoring
Forget the static, one-size-fits-never philosophy of fast fashion. The growth tuck is the ultimate hack for the frugal and forward-thinking maker. It’s a simple, elegant cheat code.
Here’s the theory: you sew a deep, finished hem or waistband, but you don’t just turn it up once. You sew a second, deeper fold of fabric behind it. This creates a hidden reservoir of extra fabric.
When your young wizard or knight has a sudden vertical leap, you don’t need a new tunic. You just snip a few basting stitches, let the tuck out, and press a fresh hem. It’s not just a seam; it’s a time machine. It’s a sartorial “undo” button for the growth spurt.
The most critical area for hackable growth is the waist. A standard elastic waist is a good start, but we can engineer it for longevity. The secret is in the casing and the elastic itself.
Instead of a single, non-negotiable elastic channel, consider these two hacks:
- The Drawstring Co-Pilot: Create a casing for both a drawstring and elastic. The elastic provides the primary fit, while the drawstring (in a separate, parallel channel) allows for on-the-fly micro-adjustments.
- The Multi-Elastic System: Use two rows of elastic in parallel channels. The top elastic is a bit looser, for comfort. The bottom one is tighter. As the child grows, you can release the top elastic first, then the bottom, effectively giving you two growth spurts’ worth of room in a single pair of pants.
But how do you choose your hack? The right method depends on the garment and the child’s growth pattern.
| Method | Best For | Growth Potentia | Skill Level | Best Garments |
|---|---|---|---|---|
| Growth Tuck | Hems on pants, sleeves, skirts, and tunics. | 1-3 inches of length | Beginner | Dress hems, pant cuffs, tunic hems |
| Adjustable Waist (Elastic & Drawstring) | Pants, skirts, and shorts. | 2-4 inches of growth in the waist and rise. | Easy | Adventure pants, casual skirts, pajamas |
| Expandable Side Panels | Close-fitting tops and bodices. | 1-2 inches of girth expansion. | Intermediate | Vests, doublets, bodices |
Implementing the Hacks: A Practical Primer
Let’s get practical. For the growth tuck, when hemming pants, add an extra 2-3 inches of fabric inside the hem allowance. Stitch the hem in place with a long, easily-removed basting stitch along the intended fold line. When it’s time, you just snip the basting, press, and stitch a new hem.
For the adjustable waist, consider using buttonhole elastic in the back of a waistband, which can be tightened with a cord lock or a series of new buttonholes as the child grows.
This isn’t just sewing; it’s a strategic, forward-thinking approach to kids’ clothing. You’re not just making a costume; you’re engineering a garment that can travel through a full season—or two—of a child’s life. It’s a small rebellion against the disposable, a quiet, clever victory of craft over consumption.
Laundry & Care for the Daily Grind (and Grime)
You’ve worked hard on your child’s new tunic or cape. It’s a masterpiece of fabric and thread. But the real test is in the laundry room, where your creation faces the washing machine.
The washing machine is like a tough boss level for your garment. The spin cycle is the final challenge, and your French seams are the hero. This guide is about making sure your creation can handle the daily grind and grime of child’s play.
Battle-Testing Your Stitches
Heat, agitation, and mystery stains are the enemies. The fabric you chose is your first defense. Cotton broadcloth is durable but can shrink. Polyester blends resist wrinkles but may hold odors.
The care label is important, but you’re the real label. Use a serger for seams to handle more agitation. For adventure pants and reversible cape, a cold or warm wash is best. Hot water can damage elastics and set stains.
Stains are the biggest challenge. Act fast and use cold water. For grass-and-mud stains, try a baking soda paste before washing. Spot-treat the cape’s emblem with a gentle stain remover to keep colors bright.
The dryer is not your friend. It can cause pilling, shrinkage, and damage. The best option is to air-dry everything. Lay flat or use a drying rack to protect your work. For elastic-waist adventure pants, line drying keeps the elastic stretchy and prevents waistband roll.
After washing, do a post-wash inspection. Check seams and elastic casings for any issues. This step prevents problems later. A small thread issue now can save your garment from a big failure.
Printable Measurement Sheet & Cut Lists
Every great project starts with a plan. Before you begin, you need a guide. This is yours.
Your Pattern & Planning Kit
This is like your project’s lab notebook. It turns you from a follower into a project manager. We’ve made it simple and fun.
The Measurement Tracker is your first tool. Kids grow fast, and this log helps track their measurements. It makes fitting easier later on.
The Fabric Yardage Grid helps with fabric needs. It prevents running out of fabric at the last minute. It also considers nap and print direction.
The Materials Manifesto is a checklist for everything you need. It includes 1 spool of patience. This kit is your guide to success.
Download your planning kit. With data, you can manage easy kids patterns projects. Your journey in making elastic waist pants and reversible capes is ready to begin.

